
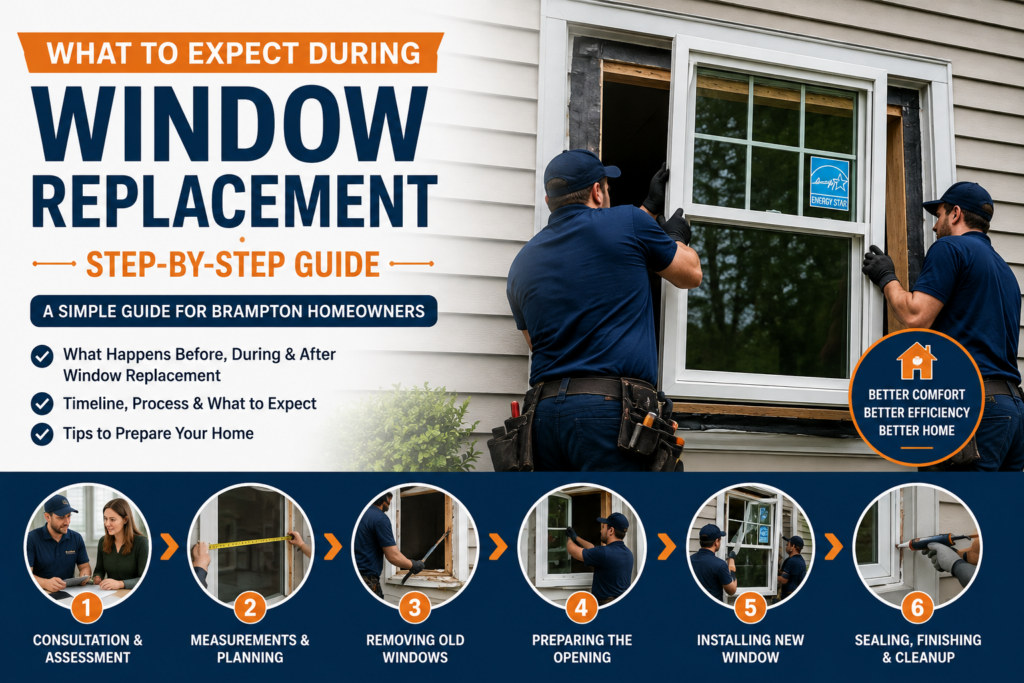
Replacing your windows is a major home improvement project, but it doesn’t have to be stressful. If you’ve never gone through a window replacement in Brampton before, you may have questions about what happens on installation day, how long the work takes, what you need to do beforehand, and what happens if the installer discovers an issue behind the old window.
The good news is that professional window replacement follows a fairly organized process. From the initial assessment and measurements to removing the old windows, installing the new ones, sealing the openings, and cleaning up, each stage plays an important role in the final result.
Whether you’re replacing one drafty window or upgrading the windows throughout your Brampton home, knowing what to expect can help you prepare properly and make better decisions.
Start With a Window Assessment
The window replacement process usually begins with an assessment of your existing windows. A professional installer will look at the condition of the windows, frames, surrounding areas, and installation openings.
You may notice obvious problems such as cracked glass, damaged frames, or windows that are difficult to open. Other issues can be less noticeable, including drafts, moisture between panes, air leakage, or poor insulation.
During the assessment, it is also worth identifying what you want your new windows to accomplish. Are you mainly concerned about reducing drafts? Do you want more natural light? Are you renovating your home and looking for a completely different appearance?
Understanding these priorities helps narrow down the right replacement windows for your Brampton home.
Choose Your New Windows
Once the condition of the existing windows has been reviewed, you can start choosing the new ones. There isn’t one window style that is ideal for every room.
Casement windows are a popular choice when ventilation and a tight seal are priorities. Sliding windows are easy to operate and can work well where space is limited. Double-hung windows offer a more traditional appearance, while picture windows are useful when your main goal is bringing in natural light and enjoying a view.
You will also need to consider the frame material. Vinyl, fiberglass, aluminum, and wood windows each have different characteristics in terms of appearance, maintenance, durability, insulation, and price.
Glass is another important consideration. Depending on your home and budget, you may compare double-pane and triple-pane options, Low-E glass, and insulating gas-filled units.
For window installation in Brampton, the best choice isn’t necessarily the most expensive product. It should be a window that fits your home, renovation goals, performance requirements, and budget.
Get Professional Measurements
Accurate measurements are one of the most important parts of a successful window replacement project.
Before your new windows are ordered, the installer will typically measure the existing openings and assess the surrounding structure. Measurements may include the width and height of the opening, frame dimensions, sill condition, and other details that affect how the replacement window will fit.
This is particularly important when replacing older windows because the existing openings may not be perfectly uniform.
Professional measurements also give the installer an opportunity to identify potential complications before installation day. It is much easier to address an issue during the planning stage than after a new window has arrived.
How to Choose Windows for a Home Renovation in Brampton: A Practical Guide
Review the Quote and Installation Plan
Before the windows are ordered, take time to understand exactly what is included in your quote.
A window quote may cover more than the actual window. Ask whether the price includes removal of the existing windows, disposal, installation, insulation, exterior sealing, interior finishing, trim, and cleanup.
You should also confirm the exact window specifications, including the style, dimensions, frame material, glass package, colour, hardware, and any decorative features.
Don’t hesitate to ask about the expected timeline. Custom windows can require additional time before they arrive, and the installation schedule can depend on the size of the project and other factors.
A detailed quote helps prevent misunderstandings later.
Prepare Your Home Before Installation Day
A little preparation can make window replacement in Brampton much easier for everyone.
Start by moving furniture away from the windows being replaced. Sofas, beds, desks, tables, and other items should be moved far enough back to give the installation team comfortable access to the work area.
Remove curtains, blinds, shades, and other window coverings before the installers arrive. If you plan to reuse them, keep the hardware in a safe place.
It is also a good idea to remove fragile decorations and valuable items from nearby surfaces. If there are outdoor obstacles around the windows, such as patio furniture or garden items, move them when possible.
Finally, think about children and pets. Window installation can involve noise, tools, dust, and open window openings, so keeping children and pets away from the work area is a sensible precaution.
What Happens When the Installation Team Arrives?
On installation day, the crew will generally begin by reviewing the work area and confirming which windows are being replaced.
Depending on the project, installers may put down protective coverings to help protect floors and nearby surfaces. They will also organize their tools and materials before beginning the removal process.
If several windows are being replaced, the installation team may work through the home in a planned sequence. The exact order can vary depending on the property and project.
If you have any last-minute questions, this is a good time to ask them. Once work begins, the process tends to move more efficiently when everyone understands the plan.
Removing the Old Windows
The next step is removing the existing windows.
The removal method depends on the type of window and how it was originally installed. Installers may remove the operating sections, glass, frame, or other components before taking the window out of the opening.
You should expect some noise and dust during this stage. There may also be a short period when an opening is exposed while the old window is being removed and the new one is prepared for installation.
Professional removal is important because the installer needs to protect the surrounding wall, framing, and trim as much as possible. Careful removal also makes it easier to inspect the opening and identify problems that may have been hidden behind the old window.
Inspect and Prepare the Window Opening
After the old window is removed, the installer can see what’s actually happening inside the opening.
This is when problems such as moisture damage, deteriorated materials, damaged insulation, or other issues may become visible.
Not every installation will uncover a problem, but homeowners should understand that an older window can sometimes hide damage around the opening.
If an issue is discovered, ask the installer to explain what caused it, what needs to be repaired, and whether the repair will change the original cost or timeline.
Once the opening is ready, it can be cleaned and prepared for the new window.
Install the New Window
Now comes the main part of the window installation process.
The new window is positioned inside the prepared opening and checked carefully. Proper positioning is important because a window that isn’t correctly aligned can create problems with operation, sealing, and long-term performance.
The installer will typically check that the window is level and square before securing it according to the appropriate installation requirements.
Once it is properly positioned and secured, the window should operate smoothly without unnecessary resistance.
This step may look straightforward, but professional installation requires attention to detail. The quality of the window and the quality of the installation both matter.
Insulate and Seal Around the Window
A properly installed window needs more than secure fasteners. The space around the frame also needs to be appropriately insulated and sealed.
Insulation around the window can help reduce unwanted air movement and heat transfer. Exterior sealing helps protect the transition between the window and the surrounding wall from air and moisture infiltration.
This is particularly important for homeowners in Brampton, where windows have to deal with cold winter temperatures, summer heat, rain, and changing weather throughout the year.
If you’re investing in energy-efficient windows, proper installation is essential to getting the performance you expect from them.
Complete Interior and Exterior Finishing
Once the window itself is installed and sealed, the installer may complete the finishing work around it.
Interior work can include trim, casing, caulking, or minor finishing depending on the condition of the existing area and the scope of the project.
On the exterior, finishing may include capping, exterior trim, and appropriate caulking.
The exact finishing process varies from one home to another. A straightforward replacement may require minimal finishing, while a renovation involving modified openings may require more extensive work.
Before the project starts, ask what interior and exterior finishing is included in your agreement.
12. Test the New Window
Before the installation is considered complete, each new window should be checked.
Open and close the window to make sure it operates smoothly. Test the locks and check that the window closes properly.
Look around the frame for obvious gaps or unfinished areas. You should also check that the trim and surrounding surfaces are in good condition.
This is also the right time to ask the installer how to operate and maintain your new windows.
For example, ask how the screens are removed, how the tracks should be cleaned, and whether there are any specific maintenance recommendations.
Clean Up After Window Installation
Window replacement can create dust, packaging, and old construction materials, so cleanup is an important part of completing the project.
Installers may remove old window components and installation debris as part of the agreed service. However, cleanup expectations can differ between companies, so confirm this before work begins.
After the crew has finished, walk through the installation areas. Check the windows, trim, surrounding walls, and floors before signing off on the completed work.
If you notice something that needs attention, bring it up before the crew leaves whenever possible.
How Long Does Window Replacement Take?
There isn’t one fixed timeline for every Brampton window replacement project.
Replacing one window may take considerably less time than replacing windows throughout an entire house. The total schedule can depend on the number and size of windows, installation method, accessibility, finishing requirements, weather, and whether unexpected damage is discovered.
A whole-home replacement may take several days, while a smaller project may be completed much sooner.
If you’re planning other renovations at the same time, discuss the window schedule with your contractor. Window installation can affect interior finishing, trim, painting, siding, and other work.
What If the Installer Finds Unexpected Damage?
One of the biggest surprises during window replacement is discovering damage behind an old window.
Moisture can sometimes cause deterioration around the opening, particularly if an old window has leaked over time. The installer may also discover damaged framing or insulation.
Don’t simply approve additional work without understanding what is being repaired. Ask for an explanation and, if there is an additional cost, make sure you understand the price before proceeding.
Addressing underlying problems is important. Installing a new window over damaged materials doesn’t solve the original issue.
What Should You Do After the New Windows Are Installed?
Once installation is complete, give yourself some time to become familiar with your new windows.
Follow any recommendations from your installer regarding sealants and finishing materials. Keep your warranty and product information somewhere you can easily find them.
Basic maintenance usually includes keeping the glass and tracks clean, checking hardware, and paying attention to any changes in operation or sealing.
If a window becomes difficult to open, develops an unusual gap, or shows signs of water infiltration, don’t ignore the issue. Contact the installer or an appropriate professional to determine what’s happening.
Common Window Replacement Mistakes to Avoid
A few simple mistakes can make a window project more complicated than necessary.
Choosing windows only because they look good: Appearance matters, but so do energy performance, ventilation, durability, and operation.
Focusing only on the lowest price: The cheapest quote may not include the same materials, installation work, finishing, or warranty as another quote.
Ignoring installation quality: A high-quality window still needs to be installed correctly.
Not asking what the quote includes: Make sure you understand removal, disposal, insulation, sealing, finishing, and cleanup.
Waiting until installation day to prepare: Moving furniture and removing window coverings beforehand can make the process smoother.
Skipping the final inspection: Test every window and review the finished areas before the project is considered complete.
A Simple Window Replacement Checklist
Before installation:
- Confirm your window styles and specifications
- Approve measurements
- Review the complete quote
- Confirm the installation date
- Remove blinds and curtains
- Move furniture away from windows
- Clear exterior access
- Keep children and pets away from work areas
During installation:
- Confirm window locations
- Protect interior areas
- Inspect openings after old windows are removed
- Confirm proper window positioning
- Check insulation and sealing
- Review interior and exterior finishing
After installation:
- Open and close each window
- Test locks and hardware
- Inspect the finished areas
- Confirm cleanup
- Save warranty information
- Ask about maintenance
How to Choose a Window Replacement Company in Brampton
Choosing the right installer is just as important as choosing the right window.
Look for a company with experience handling residential window replacement and different types of homes. Ask for a detailed written quote rather than relying on a basic verbal estimate.
Customer reviews can also provide useful insight into workmanship, communication, punctuality, and overall service.
It’s also worth asking about warranties. Make sure you understand what is covered by the window manufacturer’s warranty and what coverage, if any, applies to the installation itself.
Most importantly, choose an installer who is willing to explain the process and answer your questions. A professional shouldn’t make you feel rushed into a decision.
Final Thoughts
A window replacement project involves several steps, but understanding the process makes it much easier to prepare.
From the first assessment and professional measurements to removing the old windows, preparing the openings, installing and sealing the new units, and completing the finishing work, every stage contributes to the final result.
For Brampton homeowners, choosing windows that suit the property is only part of the equation. Proper installation, insulation, sealing, and finishing are equally important for long-term comfort and performance.
If you’re planning window replacement in Brampton, take the time to compare your options, ask questions, understand the installation process, and choose an experienced local professional Like Advance Windows Inc. . With the right preparation, replacing your windows can be a straightforward home improvement project that improves both the appearance and everyday comfort of your home.